


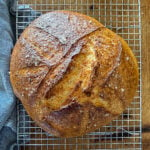


This Dutch oven no-knead bread is crusty on the outside, soft and airy inside, and incredibly easy to make with just 4 simple ingredients. No kneading, no fancy techniques, and practically foolproof—even for beginner bread bakers.
Let's get started!
5-Star Review
"O.M.G This is the first time something has actually been easy and perfect as the Insta video suggested. For anyone on the fence like I was, please try this recipe. I literally plopped my dough onto the floured surface, pushed it twice to get it round and BINGO, a round shape was formed and it went in the oven. I have been burned trying so many recipes before that claim to be quick and easy. I’m deleting all bread pins. I have found THE bread. This will be toast in the morning, this will be sliced for stew. So versatile. Thank you to your video who made it seem so easy. I’ll be checking out your other stuff on your site."
-Jen
Jump to:
- 5-Star Review
- Pull Up A Chair & Let's Chat!
- What You'll Need & Why
- Why a Dutch Oven Makes Better No-Knead Bread
- Swaps & Variations
- For My Sourdough Lovers
- Tips For The Best Dutch Oven No-Knead Bread
- Dutch Oven No Knead Bread Recipe
- Serving Ideas
- Storage, Freezing & Reheating
- You Asked, I Answered
- You'll Also Love
- Who's Stirring The Pot?

Pull Up A Chair & Let's Chat!
If you’ve ever wanted homemade bread without all the kneading, folding, and fuss, this Dutch oven no-knead bread is for you. With just 4 simple ingredients and a hands-off rise, you get a bakery-style loaf with a crisp crust and soft, airy center—no experience required.
When I want a warm, crackly loaf, I want it today. And that’s exactly why this Dutch Oven No Knead Bread exists — stupid simple, wildly delicious, and impossible to mess up.
Why You'll Love Dutch Oven No-Knead Bread
- High hydration = amazing texture. The wetter dough creates that crisp, crackly crust and soft, open crumb without any kneading or fancy technique.
- Long, hands-off rise builds deep flavor. Time does all the work here. No folding, stretching, or staring at your dough like it owes you money.
- The Dutch oven acts like a mini steam chamber. It traps moisture, boosts oven spring, and gives you bakery-level crust with zero effort.
- Beginner-proof process. If you can stir ingredients in a bowl, you can make this bread. No kneading, no shaping gymnastics, no stress.
- Four ingredients, endless payoff. Flour, water, yeast, salt — everyday ingredients that turn into something wildly impressive.
- Consistently reliable. This recipe works the same way every time, even if you’ve never baked bread before.
What You'll Need & Why
- All-Purpose Flour – The base of our beautiful, bakery-style loaf.
- Instant Yeast – No proofing needed; it wakes up and gets to work fast.
- Kosher Salt – For flavor and balance.
- Water – Yep… that’s the whole list.
Optional but delightful:
- Flaky Sea Salt + Fresh Cracked Black Pepper – Sprinkle on top of your Dutch oven no-knead bread before baking for a salty crunch and a little personality. Totally optional, but highly recommended.

Why a Dutch Oven Makes Better No-Knead Bread
Listen… the Dutch oven is doing most of the work here. It traps steam, boosts oven spring, and basically turns you into a bread wizard with zero experience. A good one makes all the difference.
I’ve owned Staub and Le Creuset for years — pricey, yes, but they’re tanks with warranties to match. Every cheaper option I tried? Chipped. Cracked. Retired early.
If you’re going to invest in one piece of cookware, make it this. You’ll use it for everything from soups to my Dutch Oven Pot Roast to (of course) this Dutch Oven No-Knead Bread.
 Buy Now →
 Swaps & Variations
This loaf is simple enough to keep classic, but easy to dress up when you feel like it. I've got several fun options below!
Add any dry spices in with the flour, and fold in cheeses, herbs, or mix-ins right before shaping the Dutch oven no-knead bread dough so you don’t knock out all those lovely air bubbles. Keep it loose, rustic, and imperfect — that’s the charm.
- Garlic + Herb - 1–2 tsp dried Italian herbs, ½–1 tsp garlic powder
- Everything Bagel - 1–2 tbsp everything bagel seasoning on top (Optional: mix 1 tsp into the dough.)
- Cheddar & Jalapeño - ¾ cup shredded sharp cheddar, 1 jalapeño, seeded + finely diced
- Olive & Rosemary - ½ cup chopped olives (blotted dry), 1 tsp fresh rosemary
- Cinnamon Sugar Swirl - 1 tbsp cinnamon, 2 tbsp sugar
- Seeded Crust - 2–3 tbsp mixed seeds (sesame, poppy, sunflower, etc.)
- Parmesan & Black Pepper - ½ cup finely grated Parmesan, 1–2 tsp freshly cracked black pepper
- Sun-Dried Tomato & Basil - ½ cup chopped sun-dried tomatoes (oil-packed, blotted), 1 tbsp chopped fresh basil or 1 tsp dried basil

For My Sourdough Lovers
If you’re a sourdough person (same, hi), you’ve probably got extra starter hanging out in your fridge. The good news? You can absolutely turn this Dutch Oven No-Knead Bread into a sourdough loaf.
Just whisk ⅓–½ cup of room-temperature sourdough discard into the warm water before mixing the dough. That’s it — no extra steps, no extra stress. Carry on with the recipe as written and you’ll get a gorgeous sourdough-kissed loaf without waiting three weeks for a full ferment.

Tips For The Best Dutch Oven No-Knead Bread
A few small details make this simple Dutch oven bread recipe consistently easy and bakery-worthy.
- Sticky dough is normal: A wetter dough is what gives you that airy crumb and crisp crust, so resist the urge to add extra flour.
- Flour your hands well: Gentle shaping works best when your hands and counter are lightly floured.
- Preheat the Dutch oven fully: A hot pot creates steam fast and gives you the best oven spring.
- Use parchment paper: It makes transferring sticky dough into a blazing-hot pot much easier.
- Score the top: One quick cut helps the Dutch oven no-knead bread loaf expand beautifully as it bakes.
- Cool before slicing: Give it at least 15–20 minutes so the crumb sets properly.
 Buy Now →

Dutch Oven No Knead Bread Recipe
Equipment
- large mixing bowl
- dutch oven
- parchment paper
Ingredients
- 3½ cups all-purpose flour
- 2¼ teaspoon instant yeast
- 2 teaspoon kosher salt
- 2 cups warm water
- flaky sea salt and course ground pepper optional for topping
Instructions
Dough Prep
- Add flour, yeast, and salt to a large mixing bowl and whisk together.
- Make a well in the middle of the flour and add the warm water.
- Mix until a shaggy dough forms. Cover with plastic wrap. Let rise for 3 hours.
Preheat the Oven
- When you have about 45 minutes left of rise time, preheat the oven to 450° F with your dutch oven and the lid.
Dough Formation
- Scrape the dough out onto a well-floured surface. Make sure your hands are well floured. The dough is very sticky and loose.
- Form the dough into a very simple ball being as delicate as you can be.
- Carefully, place the dough ball down in the middle of a piece of parchment paper. Score it with either a bread lame or a very sharp knife. I did a simple cross.
- Sprinkle with a little flaky sea salt and course ground pepper.
First Bake
- CAREFULLY, remove the lid from the VERY HOT dutch oven and gently lay the parchment paper and dough inside. CAREFULLY, put the lid back on and let this bake for 30 minutes.
Second Bake
- After 30 minutes, CAREFULLY remove the lid from the VERY HOT dutch oven and bake uncovered for an additional 15 minutes.
- CAREFULLY remove the VERY HOT dutch oven and let the bread cool on a cooling rack for at least 15 minutes...if you can wait that long.
- Enjoy!
Notes
Nutrition
Serving Ideas
- Soup night: Serve slices alongside my One-Pot Beef Stew, Loaded Baked Potato Soup, or Greek Lemon Chicken Orzo Soup for an instant, cozy dinner upgrade.
- Best with butter: Soft butter, salted butter, honey butter, or garlic butter all work beautifully.
- Sandwiches: Perfect for grilled cheese, BLTs, breakfast sandwiches, or anything that needs sturdy bread fast.
- Olive oil dip: Olive oil, balsamic, flaky salt, and cracked pepper instantly make it feel special.
- Charcuterie boards: Warm slices fit right in with cheeses, cured meats, and spreads.
Storage, Freezing & Reheating
Short-Term Storage (2 Days)
- Keep your Dutch Oven No-Knead Bread in a bread bag or airtight container at room temp for up to 2 days.
- I personally keep mine in the fridge, which doubles the life and keeps it fresh longer.
Freezing (2–3 Months)
- Let the loaf cool completely.
- Freeze whole or sliced in a freezer-safe zip-top bag with as much air removed as possible.
- If freezing whole: wrap it in plastic wrap first, then bag it.
- If freezing sliced: grab one piece at a time for toast, sandwiches, or late-night snacking (no judgment).
Reheating
- For a crisp edge: pop slices in the toaster until warmed through.
- For soft and steamy: wrap a slice in a damp paper towel and microwave for 15–20 seconds (my kids’ method of choice).
- For reheating a whole loaf: warm in a 300°F oven for 10–12 minutes to refresh the crust.
You Asked, I Answered
Do I have to use a dutch oven?
Technically, no. You can bake this on a sheet pan or in another oven-safe pot — but the crust won’t be as crisp and the loaf won’t rise as dramatically. The Dutch oven traps steam and gives you that bakery-level finish. You can skip it… just lower your expectations a bit.
My dough feels super sticky… is that normal?
Yes! Dutch oven no-knead bread dough is supposed to be loose and sticky — that’s what gives it the amazing texture. Just flour your hands and work surface well, gently coax it into a rough ball, and try not to over-handle it. The air bubbles you keep are what help the bread “oven spring” and turn out big, fluffy, and beautiful.
Do I need to this rise in a warm place?
Room temperature is usually perfect — not too hot, not too cold.
If your kitchen feels chilly, turn your oven on for 30–45 seconds, turn it off, and place the covered bowl inside. The trapped residual heat makes a cozy little rise chamber.
Do I really have to let it cool before slicing?
I will never tell you not to tear into warm bread — I’m not that kind of girl. But the loaf does benefit from a short rest. Let it cool 10–15 minutes so the crumb can set. It’ll slice cleaner and stay fresher longer.
Why did my dough not rise?
A few things could be the culprit:
1. Dead yeast. If your yeast is old or inactive, toss it and start fresh.
2. Too cold. Yeast likes a comfortable environment. If the room is chilly, use the “warm oven trick” above.
3. Too hot. Water that’s too warm can kill the yeast instantly. Aim for warm—not hot.
Why is my loaf dense?
Because this is a no-knead recipe, gluten development is naturally lower. That means it’s extra important to handle the dough gently and keep as many air bubbles as possible. Overworking or squeezing the dough will collapse those bubbles and make the loaf dense.
You'll Also Love
If working with dough sounds like your kind of kitchen therapy, here are a few more worth saving.
- No-Knead Sheet Pan Pizza: Crisp edges, chewy center, and no complicated dough work.
- Fluffy Cinnamon Rolls With Cream Cheese Frosting: Soft, gooey layers that make any morning better.
- Savory Monkey Bread: Pull-apart, buttery, and packed with bacon and cheese.
- Cottage Cheese Bagels: High-protein, easy, and surprisingly satisfying. With 4 ingredients, they're perfect for breakfast or as a sandwich vessel.
- Homemade Flour Tortillas: Soft, flexible, and worth making from scratch.
- Gluten-Free No Knead Bread: The GF version of this bread that anyone can enjoy!
Who's Stirring The Pot?
Hi, I’m Ruth—recipe developer, comfort-food creator, and the voice behind Rufus For Real. I specialize in cozy, doable, flavor-packed meals for real-life kitchens, and I’m a firm believer that breakfast, dinner, and everything in between should be simple, satisfying, and impossible to mess up.
You’ll find me sharing even more comfort-food goodness, kitchen tips, and behind-the-scenes chaos over on Instagram, Pinterest, Facebook, TikTok, and YouTube (@rufusforreal everywhere).
If you love approachable recipes with a whole lot of personality, pull up a chair—there’s always room at this table.
Happy Cooking!
-Ruth aka Rufus
Jai Knoot says
It is the fastest and easiest recipe for a loaf of bread.
My entire family was impressed with its taste and texture.
Rufus says
Hi, Jai! I'm so happy to hear you guys liked it! Have a wonderful day!
Morgs Berry says
This recipe is so simple and easy, and the loaf is great! I’ve made it four times this week as I’ve been giving homemade jam to friends. When I made it today I subbed for bread flour (since I was low on ap after already making three loaves), it was a little denser but still good but not quite as good. Maybe it need a bit more water? I’m not sure, I’m brand new to bread and this recipe is fool proof. But I found that the dough wasn’t quite as wet when I used the bread flour, and baked a little denser.
Rufus says
I'm so glad you liked it! It really is a great recipe! As for the denseness, bread flour generally doesn't make things more dense, just a tad chewier. Maybe a tad more water would help if use bread flour instead of ap. Have a wonderful day!
Taylor Wattenbarger says
My family and I have loved your bread since I found your page! It’s so simple and delicious. Ive always tried to master sourdough bread, but couldn’t get it. My husband and I are not even worried about sourdough anymore with your recipe. Hah. Ive made a loaf a week for us, or for friends and invites to dinners.. it’s been a hit every time! Thank you so much!
I was just curious if you had any tips or suggestions about baking time for doubling the recipe?
Rufus says
I am so glad to hear that you guys love this recipe! I've never tried to double the recipe, so I can't say for sure about baking time. I would say just make sure the pot you're using is big enough. Let me know if you have any more questions!
Cindy says
How long do I knead if I don’t have a mixer? Is that even an option on the no knead bread? Lol
Rufus says
You don't knead it at all. That's the beauty of this bread. You mix it, let it rise, turn it into a ball, lightly score it and bake! That's it! You don't need a mixer or bread maker or anything!
Emma says
Can you substitute AP flour for bread flour?
Rufus says
Yes, you can! It's great!
Meg says
I need to purchase a Dutch oven, what size do you recommend? Thank you!
Rufus says
Hi! I would look for one that's about 7 quarts. It's great for bread and everything else! Let me know if you have any other questions. I'd be glad to help!
Rachel says
I have never made bread before, and this came out perfectly! My family of four devoured it! I couldn’t cut the bread fast enough!
Rufus says
I am so very happy to hear it! This is what it's all about! Thank you so very much for letting me know. You guys have a great day!
Ana Barrera says
Hi!! Could you substitute a Dutch over for a bread loaf tin or tins?
Rufus says
Hi!!! I have not tested this, so I'm not exactly how sure it will turn out. If you do that, I would recommend letting it rise in two small loaf pans and baking from there. Just mix the dough, cut it in half, one half into one loaf pan, the second half in the other the loaf pan and let it rise, then bake. Grease the loaf pans well. Just keep an eye on it when baking. Not sure on times. I hope that makes sense! Let me know how it turns out!
Barbara Lay says
Great recipe! It took me a couple of attempts to get comfortable with the recipe as well as method- it’s so much easier than any recipe I’ve used before. I’m now using this to make a Rosemary Garlic bread, and Cinnamon Brown Sugar bread. Not only is the bread phenomenal when warm with butter, but makes amazing toast in the morning. It keeps well for several days when stored in the fridge!
This will definitely be kept as a go-to for a great meal addition!
Rufus says
That is so great! I am so very happy to hear that it worked for you and I love the customization! Have a wonderful day!
Cassie H says
Look no further than this recipe. Easy, foolproof, delicious, no fuss. No need to be "afraid" to bake a loaf of bread. Now get baking & thank Rufus later! No seriously... run to your pantry!
Rufus says
This is amazing. Thank you so much!
Jen says
O.M.G This is the first time something has actually been easy and perfect as the Insta video suggested. For anyone on the fence like I was, please try this recipe. I literally plopped my dough onto the floured surface, pushed it twice to get it round and BINGO, a round shape was formed and it went in the oven. I have been burned trying so many recipes before that claim to be quick and easy. I’m deleting all bread pins. I have found THE bread. This will be toast in the morning, this will be sliced for stew. So versatile. Thank you to your video who made it seem so easy. I’ll be checking out your other stuff on your site.
Rufus says
You've made me the happiest girl ever! I am so, so happy to hear this! You have a wonderful day and let me know if you ever have any questions!
Mary-Ann says
This came out perfectly. This was my first time making bread and it did not disappoint. Thank you so much for the post on Instagram. I am no longer intimidated and this will be a regular for sure!
Rufus says
I am so, so glad you had such success! It means the world to me to hear from you! Have a wonderful day and make some more bread!
Randi says
Love this recipe!! I’m new to the bread baking game and loved the simplicity of this recipe. Question, I’d like to attempt making a sourdough version, do I still add the fast acting yeast in that scenario? Also, I’m thrown by the ‘in 3 weeks you’ll have a great sourdough’? Is that how long it needs to rise??
Rufus says
Hi! The 3 weeks comment is just a joke. It doesn't take that long to make sourdough. Also, to make the sourdough version, yes you will still add the yeast. By adding discard to the water, you're simply flavoring this bread. It's not technically a sourdough loaf, but tastes just like one. It's just a very quick and easy way to get a sourdough-like loaf, in very little time with very little effort! Please let me know if you have any questions! I'm glad to help!
Perry says
Hi! Any chance you’ve tried this with gluten free all purpose flour?
Rufus says
I have tested it with gluten-free flour and it was a big fail. I'm testing the GF version now. I just need a little more time!
Jill says
Any luck with a gluten free version?
Rufus says
I should be able to get the recipe out in the next week or so!
Alexandra says
This is such a fantastic, easy recipe. We keep our house very cold in the summer and I’ve never had an issue with it rising. It’s also very fool proof. The first several times I made it I definitely made some errors, and even so it turned out delicious. My kids devour this bread and has become my weekend ritual to make 2-3 loaves to get us through the week! Give it a try, you won’t regret it! This is the bread recipe for those that hate making bread. You may end up loving it!
Rufus says
I can not tell you how glad I am to hear this! I'm so very happy you guys love it! Have a fantastic day!
Henry Mider says
Hi, what size Dutch Oven is this recipe used on??
Rufus says
I suggest a 7 quart dutch oven. It's perfect for this bread recipe!
Alexandra Tague says
I will say I also have just been using regular bread pans and it turns out great there as well 🙂
Rufus says
That's so awesome!
Bonnie Richardson says
After many struggles with the sourdough adventure - I threw in the towel! I am so excited I saw your Dutch oven bread post - this is soooo incredibly easy and delish!! This will definitely be on repeat at our house.
Rufus says
Thank you so much, Bonnie! That means the world to me!
Bonnie Richardson says
Love this!! I tried to do the sourdough adventure but threw in the towel. This is such an easy and delish bread! This is definitely on repeat in our home. Thank you and keep on posting!
Joanne says
This was my first time making a bread and this recipe made it totally successful! Love it!!
Rufus says
Thank you so much for letting me know! It truly makes my day to hear from you guys!
Eric says
Hi Ruth, I'm just getting into bread baking, and one thing that's seemed pretty consistent with everywhere I've looked is the importance of weighing ingredients versus using volume measurements. Any chance you've done that for this recipe and can supply the weights or baker's percentages? Thanks in advance!
Rufus says
I haven't weighed the ingredients for this recipe and here's why. Yes, you absolutely can get the most consistent results by weighing your ingredients. However, this recipe is specifically designed for beginning bakers and people who don't own a scale. I wanted everyone to be able to make this bread with nothing more than your typical measuring cups and spoons. And, what's more is that it's super forgiving. It works even it the measurements are just a wee bit off. It's almost impossible to mess this one up.
Kellie Miller says
If you’re not making this recipe do it right now! It is absolutely amazing and so easy. Ruth was beyond helpful when I was questioning my dough. The bread is delicious and my family is now addicted to it. Thank you so much for your help and sharing this incredible bread with us all!
Rufus says
Thank you so much, Kellie! That means the world to me!
Gwen says
Hi! I want to make this bread using slept flour along with AP. What ratio would you recommend? Thanks!!
Rufus says
Hi, Gwen! Thanks for reaching out. As for the ratio with spelt, I'm not sure. I don't use spelt. I would suggest starting small and go up as you see fit. Have a great day!