


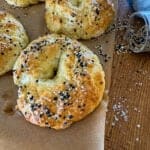
This easy Gluten-Free No-Knead Bread gives you the crisp crust and chewy interior most gluten-free loaves miss, with a simple, hands-off method and one flour that makes all the difference.
Jump to:

Pull Up A Chair & Let's Chat!
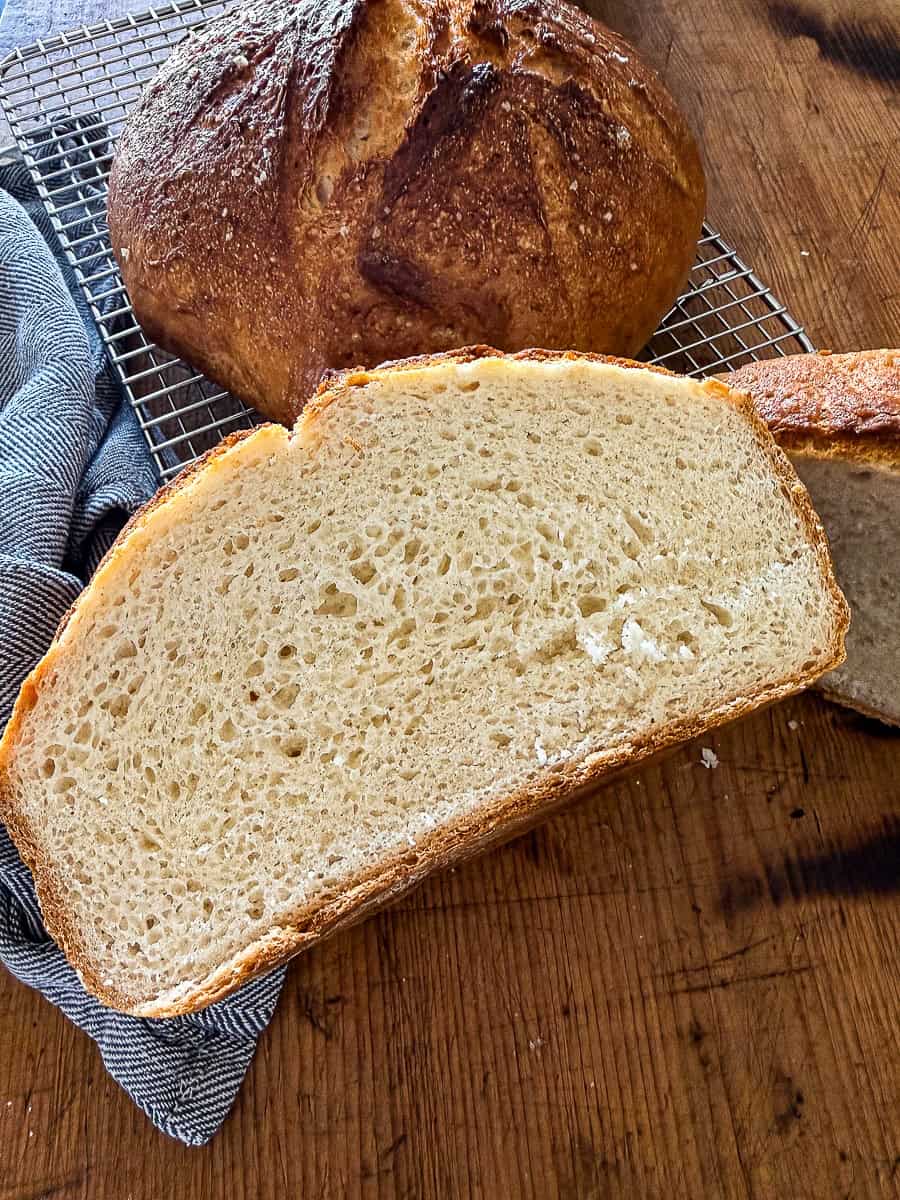
If you’ve been looking for a gluten-free no-knead bread that actually feels worth baking, this loaf delivers a crisp crust and chewy interior that most gluten-free recipes miss. It bakes up deeply golden in a Dutch oven, slices cleanly once fully cooled, and keeps the ingredient list simple while still giving you a true bread-like texture.
Finally, a straightforward, mostly hands-off, and the kind of loaf that feels like more than just a gluten-free substitute!
Why You Will Love This Gluten-Free No-Knead Bread
- Caputo Fioreglut flour: Creates better structure and helps the loaf rise with a more traditional, chewy texture.
- Honey and apple cider vinegar: Improve texture while helping the crust develop deep color and flavor.
- Hot Dutch oven: Traps steam for better oven spring and that crisp, bakery-style crust.
- No kneading required: Keeps the process simple while still delivering an artisan-style loaf.
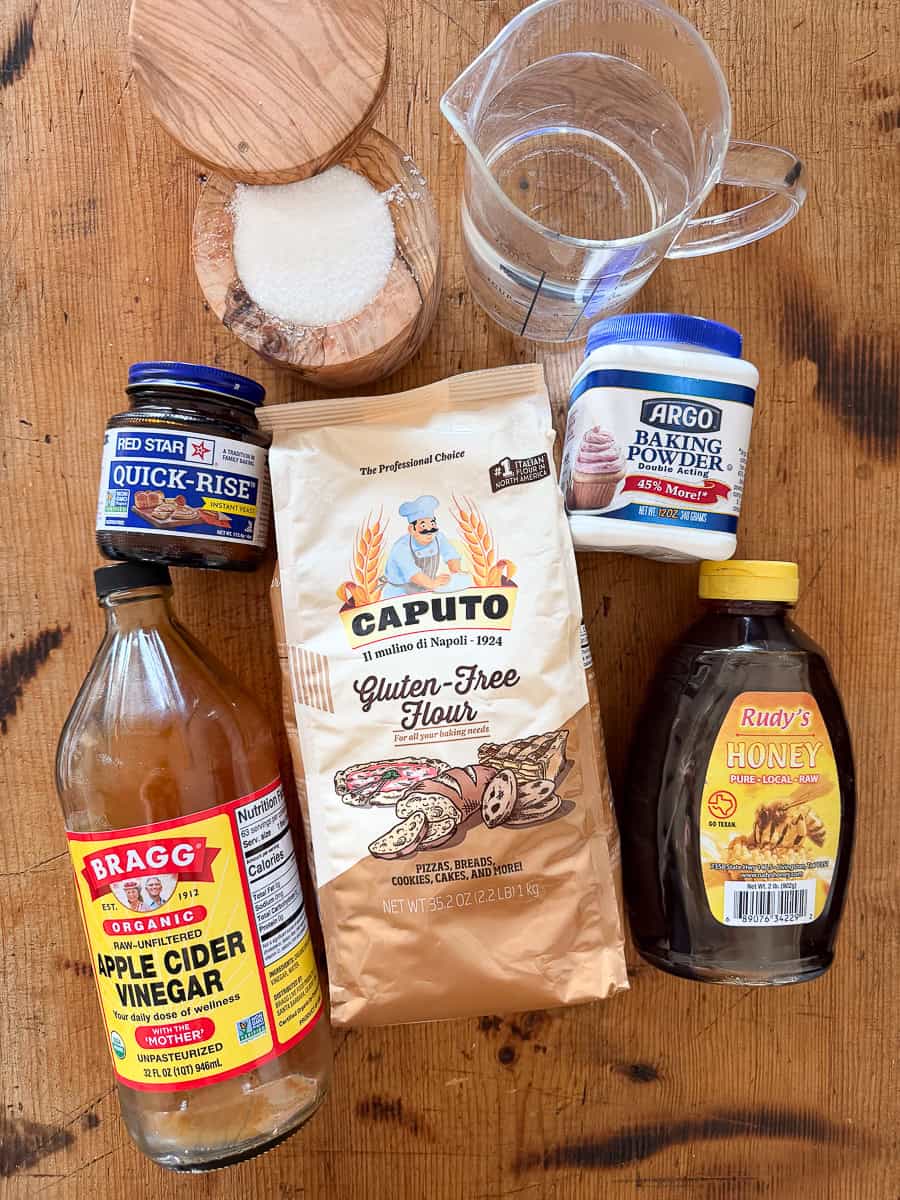
What You'll Need & Why
- Caputo Fioreglut flour: This flour gives the loaf better rise, chew, and crust than most gluten-free blends. It is gluten-free, but because it contains gluten-free wheat starch, it is not wheat-free.
- Instant yeast: Gives the loaf steady lift and helps build that airy interior.
- Baking powder: Helps boost oven spring for a lighter loaf.
- Kosher salt: Balances flavor and strengthens the dough.
- Honey: Feeds the yeast and encourages better browning.
- Apple cider vinegar: Improves texture and helps the crust develop more color.
- Warm water: Fully hydrates the flour and activates the yeast.
How to Make Gluten-Free No-Knead Bread
This gluten-free no-knead bread comes together with simple steps and mostly hands-off time.
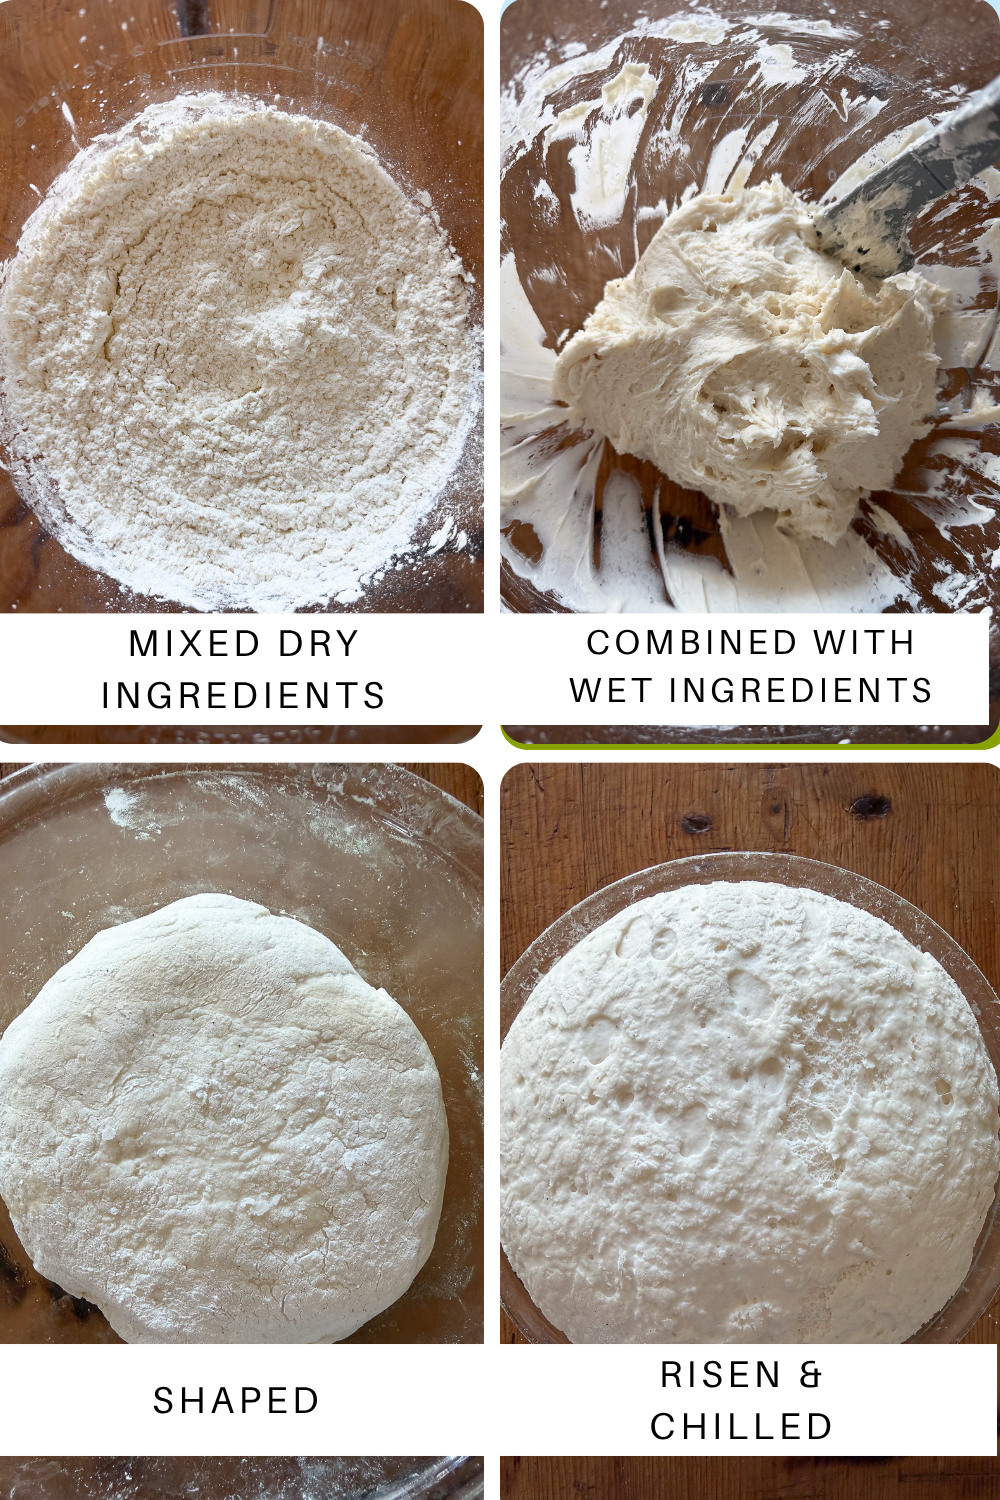
- Mix the dough: Combine the dry ingredients, then add water, honey, and apple cider and mix until a thick dough forms.
- Shape and rise: Form into a rough ball, place in an oiled bowl, and let rise until slightly puffed.
- Chill briefly: Refrigerate the dough to help it firm up and make handling easier.
- Preheat the Dutch oven: Heat the oven and Dutch oven until very hot to create the right baking environment.
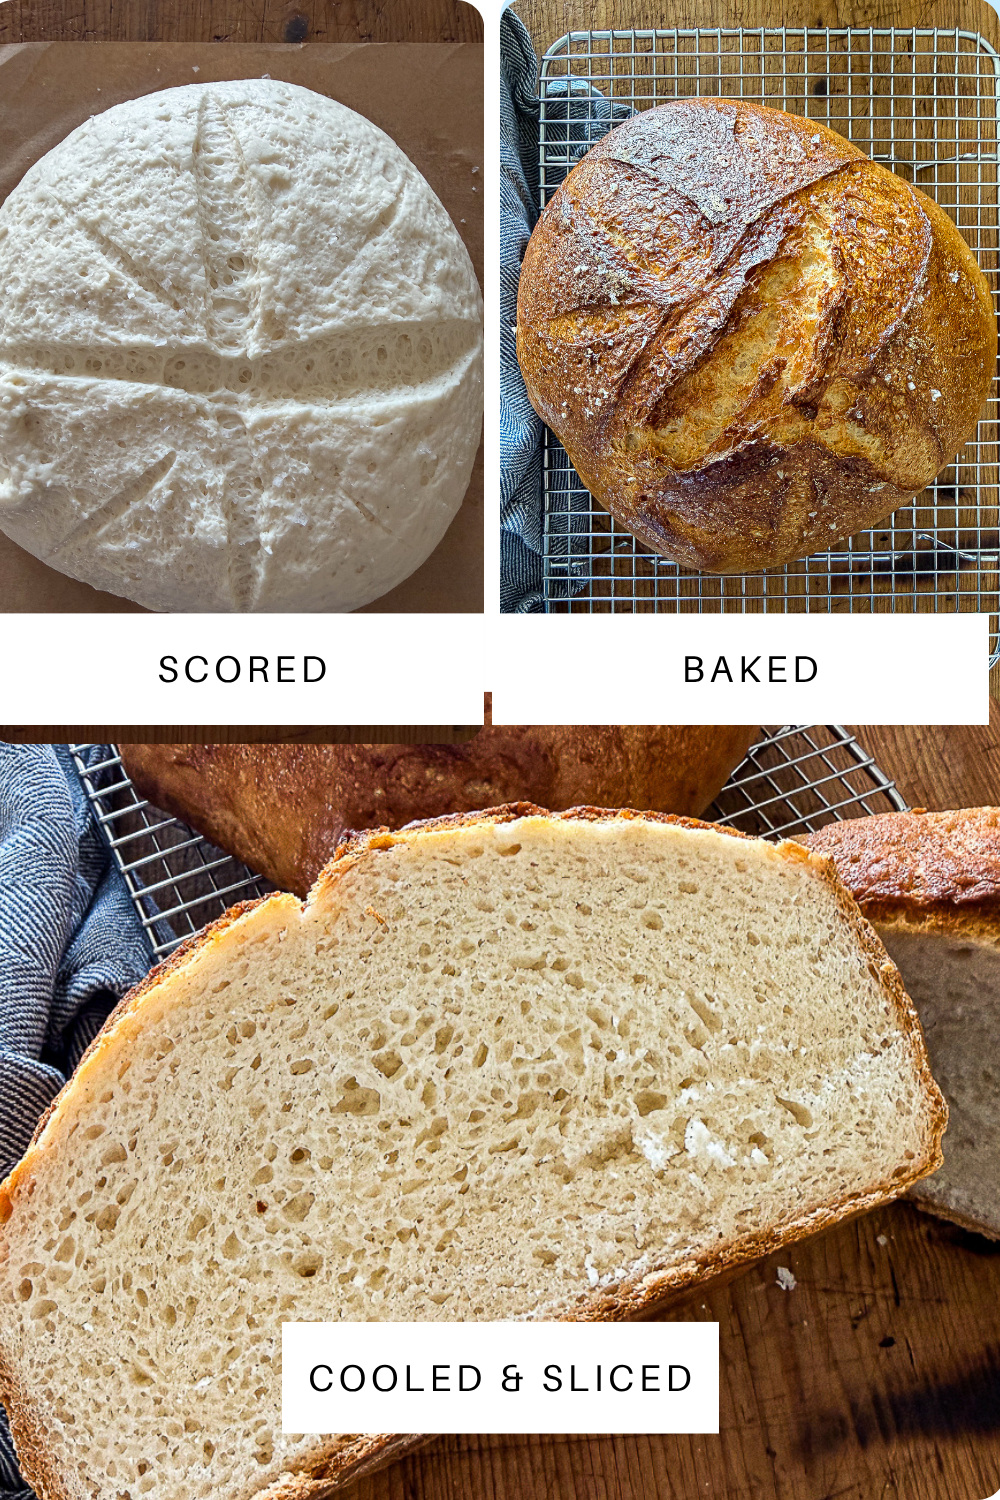
- Bake until golden: Transfer the dough, add steam, and bake covered, then uncovered until deeply golden and crisp.
- Cool completely: Let the bread cool for several hours before slicing so the texture fully sets.
Tips For The Best Gluten-Free No-Knead Bread
A few key details make a big difference in how this gluten-free no-knead bread bakes, rises, and slices.
- Use Caputo Fioreglut flour: This recipe is built around it, and it’s what gives the bread its structure and chewy texture. Other gluten-free flours will not yield the same results.
- Chill the dough before baking: A 30 minute rest in the fridge after rising helps the dough firm up and hold its shape.
- Use lightly floured hands: A very small amount of flour makes shaping easier without drying out the dough.
- Use enough olive oil for the rise: Coat the bowl well with 2–3 tablespoons of olive oil so the dough doesn’t stick. When turning the dough out onto parchment, lightly blot any excess oil to prevent pooling.
- Fully preheat the Dutch oven: A thoroughly heated pot is essential for creating a crisp crust and good oven spring.
- Cool completely before slicing: Gluten-free bread continues to set as it cools. Cutting too early will result in a gummy center.
Gluten-Free No-Knead Bread Recipe
Equipment
- small mixing bowl
- dutch oven
Ingredients
- 3½ cups Caputo Fioreglut flour
- 2¼ tsp instant yeast
- 2½ teaspoon kosher salt
- 2½ teaspoon baking powder
- 1¾ cups warm water
- 1 teaspoon honey
- 1 teaspoon apple cider vinegar
- 2-3 tablespoon extra virgin olive oil for coating the mixing bowl
Instructions
Mixing The Dough
- Combine the dry ingredients: In the bowl of a stand mixer fitted with the paddle attachment, add the Caputo Fioreglut flour, salt, baking powder, and instant yeast. Mix briefly to evenly distribute everything.
- Add the wet ingredients: With the mixer on low speed, slowly pour in the warm water, honey, and apple cider vinegar.
- Mix the dough: Increase the speed to medium and mix for about 5 minutes. The dough will be a thick batter—this is completely normal for gluten-free bread.
- Scrape and finish mixing: Use an oiled spatula to scrape down the sides and bottom of the bowl, then mix again briefly until fully combined.
Shaping and Rising
- Shape the dough: With lightly floured hands, gently form the dough into a rough ball.
- Oil and transfer: Add 2–3 tablespoons of olive oil to a small bowl, coating the bottom and sides well. Place the dough into the bowl and turn it to lightly coat in the oil.
- Let it rise: Cover and let the dough rise in a warm spot for 45–60 minutes, or until slightly puffed.
- Chill the dough: Transfer the bowl to the refrigerator and let the dough rest for 30 minutes to firm up before baking.
Baking and Finishing
- Preheat the Dutch oven: While the dough is rising, place a Dutch oven with the lid on in the oven on a middle or lower rack. Preheat to 475°F and let the Dutch oven heat for at least 30 minutes.
- Shape and score the loaf: Gently turn the dough out onto a piece of parchment paper. If you notice any excess or pooling oil, gently blot it away with a paper towel. Use a bread lame or sharp knife to score the top.
- Transfer to the Dutch oven: Carefully remove the hot Dutch oven from the oven. Using the parchment paper, lower the dough into the pot. Add 4-5 ice cubes around the edges, then quickly cover with the lid to trap the steam.
- Bake covered: Bake with the lid on for 30 minutes.
- Finish baking uncovered: Reduce the oven temperature to 450°F, remove the lid, and continue baking for another 20–25 minutes until golden brown. The loaf will sound hollow when tapped.
- Cool completely before slicing: Remove the bread from the Dutch oven and transfer it to a wire rack. Let it cool for at least 3–4 hours before cutting into it.
- Don’t rush this step: The bread continues to set as it cools, and slicing too early will result in a gummy texture and underdeveloped crumb.
- Slice and serve: Once fully cooled, slice and enjoy.
Nutrition
How To Enjoy It
- Serve it with soup: Perfect alongside creamy vegetable soup, tomato basil soup, or some of my gluten-free gumbo.
- Toast it for breakfast: A crisp slice holds up beautifully with butter, jam, or avocado or with a side of my baked egg bites.
- Build sandwiches with it: The chewy crumb makes it sturdy enough for lunch. Can you say BLT?!
- Pair it with a hearty salad: It’s especially good alongside something crisp and substantial when you want the bread to round out the meal. My grinder salad would be sooooo good alongside (or inside) this crusty bread.
Storage & Reheating
This gluten-free no knead bread keeps well, and the texture improves even more once fully cooled.
- Room temperature: Store wrapped tightly for up to 2 days.
- Refrigerate: Keep up to 4 days if needed, though the crust softens.
- Freeze slices: Slice first, then freeze for easy toasting.
- Refresh the crust: Warm in a 350° oven for a few minutes or toast slices as needed.
You Ask, I Answered
Why is Caputo Fioreglut important for this recipe?
Caputo Fioreglut is a gluten-free flour made with gluten-free wheat starch, which gives this bread its structure and chewy texture. It behaves differently than most 1:1 gluten-free flours, which is why it’s key to getting consistent results with this recipe.
Is Caputo Fioreglut wheat-free?
No. While it is gluten-free, it contains gluten-free wheat starch. Many people who avoid gluten use it successfully, but it is not suitable for those who need to avoid wheat entirely.
Why does gluten-free bread need to cool completely before slicing?
The crumb continues to set as the bread cools. Slicing too early can result in a gummy or underdeveloped texture.
What if I don't have a dutch oven?
You can bake this bread on a preheated sheet pan or in another heavy, oven-safe pot with a lid. The key is starting with a very hot surface and creating some steam, which helps the loaf rise and develop a crisp crust.
What size Dutch oven should I use?
A 5-quart or 7-quart Dutch oven both work well for this recipe. A 5-quart will give you more vertical rise, while a 7-quart allows the dough to spread slightly for a wider loaf.
Who’s Stirring the Pot?
Hi, I’m Ruth—the recipe developer and comfort-food enthusiast behind Rufus For Real. I believe dinner should be the best part of your day, not the most stressful one. That’s why I focus on "no-drama" meals that are simple, satisfying, and impossible to mess up in a real-life kitchen.
I want to hear from you! How did you like this Gluten-Free No Knead Bread? Let me know in the comments below—I read every single one!
You’ll find me sharing even more comfort-food goodness, kitchen tips, and behind-the-scenes chaos over on Instagram, Pinterest, Facebook, TikTok, and YouTube (@rufusforreal everywhere).
If you love approachable recipes with a whole lot of personality, pull up a chair—there’s always room at this table.
Happy Cooking!
-Ruth aka Rufus
Leave a Reply