


This easy recipe for sandwich bread uses just 7 ingredients and very little hands-on work. Most of the time is simple rise and ferment time, which makes it beginner-friendly, incredibly soft, and perfect for everyday sandwiches.
Let's get started!
Jump to:

Pull Up A Chair & Let's Chat!
If you want homemade sandwich bread that feels doable, this is the one. It uses just 7 ingredients, the stand mixer handles most of the work, and the result is a soft, fluffy loaf that slices beautifully for everyday sandwiches.
Most of the total time is simply fermenting and rising, which makes this especially beginner-friendly and ideal for fellow lazy bakers who want great bread without hovering over it all day.
Why It Works
- Just 7 ingredients: Nothing complicated here—mostly pantry basics and one very dependable loaf.
- Very little hands-on work: Most of the time is rise and ferment time, not active kitchen work.
- Beginner-friendly process: The stand mixer does the heavy lifting, and the shaping stays simple.
- Soft enough for everyday sandwiches: The crumb stays fluffy while the crust keeps just enough chew.
- Freezer-friendly: Make two loaves, enjoy one now, and save one for later.
 Buy Now →
 What You'll Need & Why
This easy sandwich bread recipe keeps the ingredient list simple—just 7 basics that work together to create a soft, dependable loaf.
- All-purpose flour: Unbleached all-purpose flour gives this bread a soft crumb, though bread flour works if you want a little more chew.
- Warm water: Warm water helps wake up the yeast and bring the dough together smoothly.
- Honey: Adds gentle sweetness and helps round out the flavor.
- Instant yeast: Keeps the process simple and gives the dough a reliable rise.
- Nonfat dry milk: This is what helps create that soft sandwich-bread texture and keeps the loaf from turning crumbly.
- Salted butter: Adds richness, tenderness, and just enough flavor to make the loaf taste finished.
- Kosher salt: Balances everything and keeps the bread from tasting flat.

How to Make Easy Sandwich Bread
This bread takes time, but the process itself is simple and mostly hands-off from start to finish.
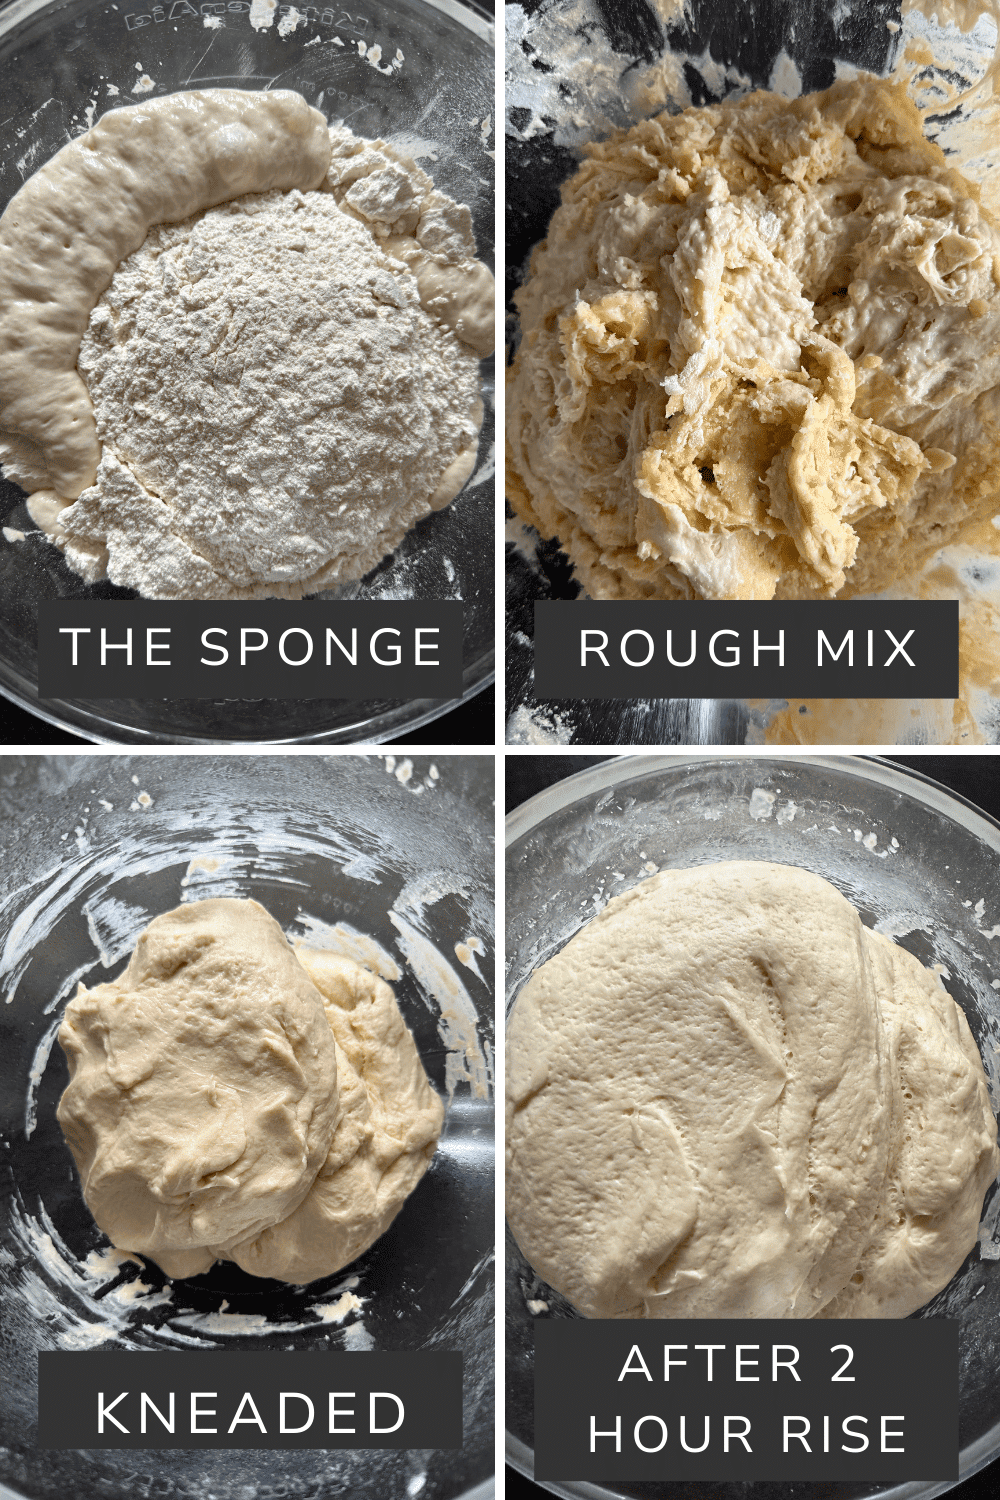
- Step 1: Make the sponge — Start by combining the first ingredients and letting them rest so the yeast can get to work.
- Step 2: Mix the dough — Add the flour mixture and let the stand mixer bring everything together.
- Step 3: First rise — Let the dough rest until soft, puffy, and doubled.
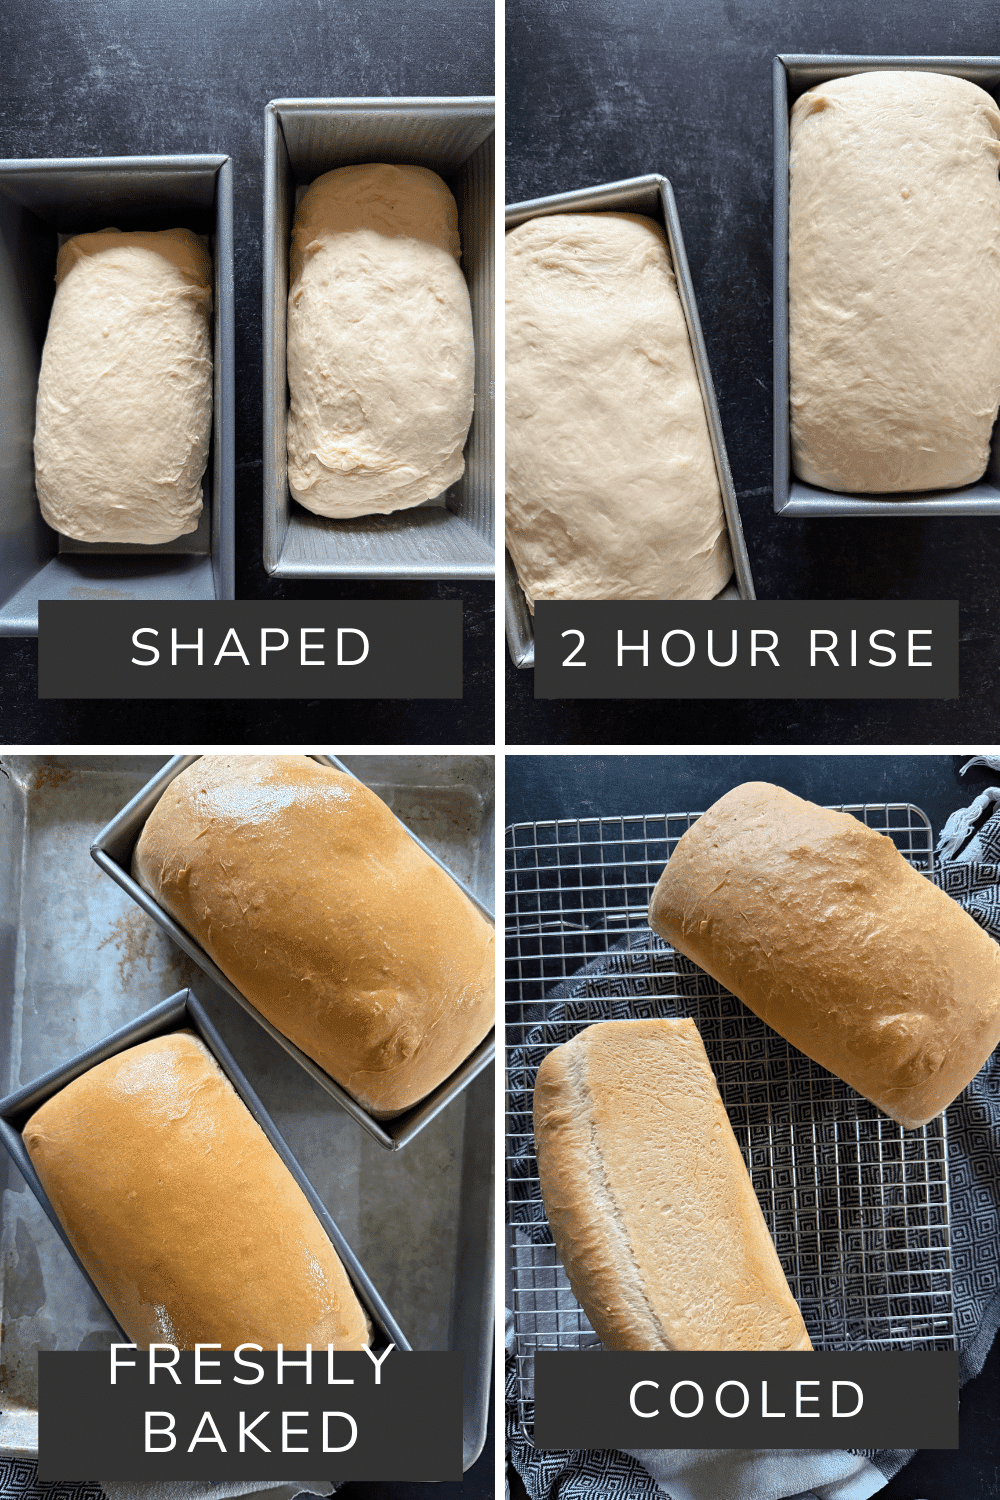
- Step 4: Shape and rise again — Divide the dough, shape the loaves, and let them rise once more.
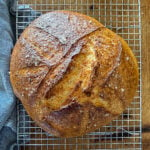
- Step 5: Bake and cool — Bake until golden, then cool fully before slicing.
Told ya it was easy! It's minimal ingredients, minimal effort, maximum return!
Swaps & Flavor-Boosting Variations
This easy sandwich bread recipe is very dependable as written, but there are a few easy ways to adjust it depending on what you have on hand.
- Swap the honey: Maple syrup works well if that is what you have in the pantry.
- Use bread flour: It gives the loaf a little more chew while still keeping the crumb soft.
- Use active dry yeast: If using active dry yeast, bloom it first in the warm water before moving on.
- Add a little whole wheat flour: Replace a small portion of the flour if you want a slightly heartier loaf without losing softness.
- Top with oats or seeds: A sprinkle on top before baking adds texture and a bakery-style finish.
- Make one loaf instead of two: Divide the recipe if you only need one loaf, or freeze the second for later.
Tips & Tricks
A few small details make this easy sandwich bread feel much easier than it looks and help guarantee a soft, reliable loaf every time.
Take your time: This recipe takes a while, but most of that time is simply fermenting and rising—not active work.
- Give the sponge the full ferment time: The full four hours builds better flavor and helps the bread develop properly.
- Use fresh yeast: Store yeast in an airtight container in the refrigerator so it stays active and dependable.
- Do not rush the rises: Let the dough look soft and puffy before moving on rather than watching the clock too closely.
- Let the bread cool before slicing: Cutting too early can make the loaf gummy instead of soft and clean.
- Do not skimp on the salt: This much flour needs proper seasoning to keep the bread flavorful.


Sandwich Bread Recipe
Equipment
- stand mixer
- Bench Scraper
- 2 9 x 5 loaf pans
Ingredients
The Sponge
- 2½ cups all-purpose flour
- 1¾ cup plus 1 tbsp warm water
- 2 tablespoon honey
- 1 tsp instant yeast
The Flour Mixture
- 2¼ cup all-purpose flour
- ¼ cup nonfat dry milk
- 1 teaspoon instant yeast
- 10 tablespoon salted butter, softened
- 2½ teaspoon kosher salt
Finishing
- ½ cup ice
- salted butter, for serving
Instructions
The Sponge
- Mix the flour, warm water, honey, and instant yeast until smooth and thick like batter. Scrape down the bowl, cover tightly, and set aside.
The Flour Mixture
- Whisk together the flour, nonfat dry milk, and instant yeast. Sprinkle it evenly over the sponge without mixing, cover again, and let it ferment for 4 hours.
The Dough
- After 4 hours, the sponge should be bubbling through parts of the flour mixture. Add the softened butter and mix on low speed with the dough hook until a rough, shaggy dough forms. Cover and let it rest for 20 minutes.
- Sprinkle in the kosher salt and knead on medium speed for 7 to 10 minutes until the dough becomes smooth, shiny, and slightly tacky. It should pull away from the sides of the bowl but still stick lightly to your fingers.
- If the dough feels too sticky, add a little flour. If it feels too stiff, add a small splash of water and knead again.
- Lift the dough out, lightly grease the bowl, return the dough, and cover loosely. Let it rise for 1 to 2 hours, or until doubled in size.
Shaping and The Final Rise
- Turn the dough onto a lightly floured surface and divide it evenly into two pieces.
- Gently press each piece into a rectangle about the length of your loaf pan. It does not need to be exact.
- Fold one side in slightly past center, then fold the other side over and pinch the seam closed.
- Starting at the long edge closest to you, roll the dough into a loaf, gently pulling it toward you as you roll to create light tension. Pinch the seam closed.
- If needed, gently roll the loaf from the center outward to match the length of the pan.
- Place each loaf seam-side down in a lightly greased 9x5 loaf pan.
- Cover and let rise in a warm spot for 1 to 2 hours, or until the dough rises about 1 inch above the pan.
Baking
- During the final rise, preheat the oven to 350° and place a sheet pan on the lower rack so it heats with the oven.
- Once the dough rises about 1 inch above the loaf pans, place the loaves in the oven above the hot sheet pan.
- Carefully pour about ½ cup of ice onto the hot sheet pan, close the oven door, and bake for about 50 minutes, turning halfway through, until the loaves are golden and a skewer comes out clean.
- Let the loaves cool on a rack for about 1 hour before slicing.
Nutrition
Storage & Reheating
This sandwich bread keeps beautifully, which is one reason I love making two loaves at a time.
- Store it whole when possible: Keeping the loaf unsliced helps it hold moisture longer.
- Counter storage: Wrapped well, the bread stays fresh on the counter for 3 to 4 days.
- Refrigerator storage: In a reusable bread bag or airtight wrap, it keeps well for up to 7 days.
- Reheat as needed: Toast slices straight from the counter or freezer for the best texture.
Make Ahead & Freezing
- Make ahead: Prepare the recipe through shaping, place the dough in a greased loaf pan, cover tightly, and freeze for up to 3 months. When ready to bake, thaw at room temperature and allow it to rise for 4 to 5 hours before baking as directed.
- Freeze baked bread: Let the loaf cool completely, then wrap tightly in plastic wrap and foil before freezing for up to 3 months. Thaw at room temperature or in the refrigerator, then toast or warm slices as needed.
You Asked, I Answered
Why use the nonfat dry milk in sandwich bread?
The milk powder helps improve texture, keeps the crumb tender, and gives the loaf better color as it bakes.
What is a sponge in bread making?
A sponge is a simple starter made from flour, water, honey, and yeast that ferments before the full dough comes together. In this recipe, it rests for about 4 hours and becomes bubbly and active.
Can I make one large loaf instead of two?
Yes. Leave the dough as one piece instead of dividing it, shape it into one loaf, and bake as directed.
What temperature should sandwich bread reach when fully baked?
The loaf should reach 210° in the center if you are checking with a thermometer.
Can beginners make this bread recipe?
Absolutely. The process takes time, but the steps are simple and the stand mixer does most of the work.
Why is my sandwich bread dense?
Dense bread usually means the dough needed more rise time, the yeast was old, or too much flour was added.
You'll Also Love
- Fluffy Cinnamon Rolls: Soft, fluffy, and exactly the kind of dough project worth waking up for.
- Cheddar Bacon Sour Cream Biscuits: Tender, buttery, and simple enough to make anytime the bread craving hits.
- Sheet Pan Pizza With No Knead Dough: Soft, chewy, and endlessly useful for easy homemade pizza nights.
- Dutch Oven No-Knead Bread: Rustic, simple, and ideal when you want homemade bread with even less effort.
- Savory Monkey Bread: Soft, pull-apart, buttery bites that disappear almost as fast as they hit the table.
Who’s Stirring the Pot?
Hi, I’m Ruth—recipe developer, comfort-food creator, and the voice behind Rufus For Real. I specialize in cozy, doable, flavor-packed meals for real-life kitchens, and I’m a firm believer that breakfast, dinner, and everything in between should be simple, satisfying, and impossible to mess up.
You’ll find me sharing even more comfort-food goodness, kitchen tips, and behind-the-scenes chaos over on Instagram, Pinterest, Facebook, TikTok, and YouTube (@rufusforreal everywhere).
If you love approachable recipes with a whole lot of personality, pull up a chair—there’s always room at this table.
Happy Cooking!
-Ruth aka Rufus
Jai Pamela says
The taste and texture of this bread is perfect!
Rufus says
I am so very glad to hear this! Thank you so much for letting me know! Have a wonderful day!